How to Configure the LiteWing ESP32 Drone with Betaflight
2026-02-04 | By Rinme Tom
License: GNU Lesser General Public License DC Motor ESP32
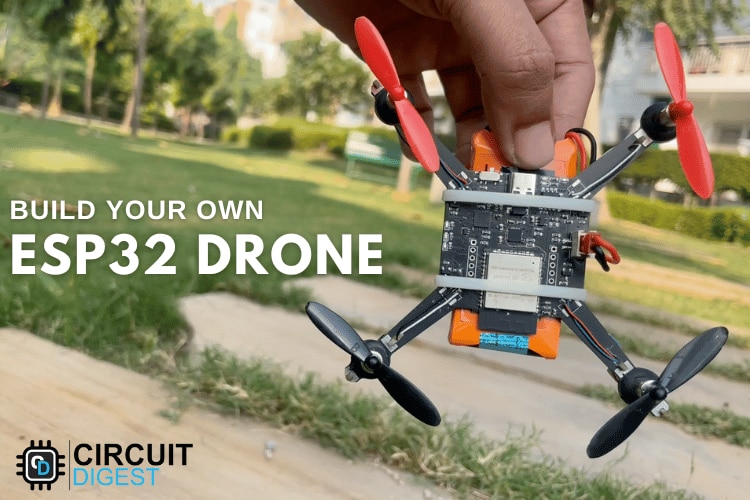
The LiteWing ESP32 drone is an open-source quadcopter platform built around the powerful ESP32-S3 microcontroller. While it ships with modified firmware by default, you can unlock full flight control tuning by integrating it with Betaflight — a widely adopted open-source flight controller software used in FPV, racing, and experimental drones. This guide walks makers through the full process of flashing Betaflight, setting up configuration software, wiring hardware peripherals, tuning flight behavior, and using advanced features like Blackbox logging.
Whether you’re new to drone configuration or an experienced developer exploring ESP32-based flight controllers, this ESP32 Drone Betaflight will give you the knowledge to get your LiteWing drone flying with precision and flexibility.
What You Will Learn
How to flash Betaflight firmware to the LiteWing ESP32 flight controller.
Installing and preparing the Betaflight Configurator for ESP32 drones.
Mapping hardware pins for motors, sensors, and receivers.
Configuring power monitoring and motor protocols for brushed motors.
Setting up receiver communication using ExpressLRS.
Assigning flight modes and tuning PID control for stable flight.
Using Betaflight’s Blackbox feature for performance analysis.
Prerequisites
Before you begin, gather the following hardware and software:
Hardware
Assembled LiteWing ESP32-S3 drone.
ExpressLRS (ELRS) receiver and transmitter system (pre-bound).
USB data cable to connect the drone to your computer.
A compatible LiPo battery for test flights.
Software
Betaflight Configurator (recommended v10.10.0).
A modern browser (Chrome or Edge) for the ESP32 flashing tool.
ESP32 Betaflight firmware binary compiled for the S3 platform.
Step 1: Flash Betaflight Firmware to the ESP32
To start, replace the default firmware on the LiteWing with a Betaflight-compatible build:
Open the ESP-FC GitHub repository and download the latest precompiled Betaflight firmware for ESP32-S3.
Launch the Espressif ESP Web Tool in your browser and connect the LiteWing to your computer.
In the web tool: select the COM port, load the
firmware_0x00.binfile, and set the flash address to0x0000.Start the flash process and wait until completion without disconnecting. Once finished, your flight controller is ready for configuration.
Step 2: Install and Prepare Betaflight Configurator
Download and install Betaflight Configurator from the official GitHub releases page (choose the installer for your OS). Once installed:
Open Configurator and enable Show All Serial Devices in the Options tab to ensure the drone’s serial port is visible.
Select the drone’s COM port manually and click Connect to link the software with your drone.
Step 3: Configure Hardware Pins
Betaflight’s default pin assignments don’t match the LiteWing’s hardware. Use the Configurator’s CLI tab to sync them:
set pin_output_0 6
set pin_output_1 5
set pin_output_2 3
set pin_output_3 4
set pin_serial_1_tx 17
set pin_serial_1_rx 18
...
save
reboot
These commands map motor outputs and key peripherals so Betaflight can control your hardware properly.
Step 4: Correct IMU Alignment
Because the onboard IMU is oriented differently than Betaflight expects, go to Configuration → Board and Sensor Alignment and set the first gyro orientation to CW 270°. This ensures the 3D model in the configurator matches your drone’s actual orientation.
Step 5: Set Battery Voltage Monitoring
To monitor battery voltage: select Onboard ADC as the source and use proper scale and divider values. Example calibration values: scale = 10, divider = 1, multiplier = 2. These ensure accurate battery readings in the configurator.
Step 6: Configure Motor Protocol
Set the motor protocol to Brushed and the PWM frequency to 8000 Hz in the Motors settings. This ensures correct control of the LiteWing’s brushed DC motors.
Step 7: Connect and Configure ELRS Receiver
Wire the ExpressLRS receiver to UART pins (TX → RX, RX → TX) and power it with 3.3V. In Betaflight:
Enable Serial RX on the corresponding UART port.
In the Receiver tab, set the mode to Serial-Based Receiver (CRSF).
You should now see real-time stick movement feedback in Betaflight.
Step 8: Assign Flight Modes
Configure flight modes such as ARM, ANGLE, and BLACKBOX using switches on your transmitter. These let you arm/disarm, choose stable self-leveling flight, and log data for later analysis.
Step 9: Tune PID Values
Replace Betaflight’s defaults with tuned PID values suited for the lightweight, brushed-motor design of the LiteWing. Proper PID tuning improves stability and responsiveness during flight.
Step 10: Record and Analyze Flight Data
Enable Blackbox and perform a test flight. Afterwards, download logs and analyze them using a Blackbox viewer. This step helps diagnose issues like oscillations or motor imbalance and refine flight characteristics.
Troubleshooting Tips
If the drone doesn’t arm, verify the ARM switch assignment and motor protocol.
Incorrect receiver data? Check wiring and CRSF protocol settings.
Erratic flight behavior may need IMU recalibration or PID fine-tuning.
Conclusion
By following this step-by-step guide, you’ll transform your open-source LiteWing ESP32 drone into a fully configured Betaflight-controlled aircraft — opening up advanced tuning, telemetry feedback, and flight-mode customization. This project is an excellent way to learn hands-on about embedded flight control systems, open-source firmware workflows, and real-world drone tuning techniques.